Quality Control is a methodology used to monitor the quality of products being purchased or acquired or manufactured. The quality of the product is the main decisive factor which determines the sales of the products from the business.
Components of Quality Control in Innoventry software: #
- Quality Parameters: Quality Parameters are specifications for the product upon which the quality of the product is judged. For example, for a business dealing with Metal Sheets, parameters can be “Thickness, Ductility, Malleability” etc.
- Defining the Parameter for Particular Items: The Quality parameters can be linked with various items. For example, a metal rod can be checked for diameter and length and a metal sheet can have parameters like thickness and area.
- Defining the Parameter for a Particular Item Group: The Quality parameters can be linked with various item groups. For example, a steel rod and cast iron rod can be checked for diameter and length having different parametric range. So for the Item Group “Steel” and “Cast Iron” we can assign different Parameters.
Where to use the created parameters? #
These Parameters can be used during carrying out a Purchase Transaction. Based on the parameters the user can take decisions on accepting the commodity or rejecting it. We will see how to do that further in the article. Also a report can be created and printed displaying the Quality Report using the Innoventry Software.
>>Steps to create Quality Parameters: #
Step 1: Select “Master”>”Quality Control”>”Quality Parameter”

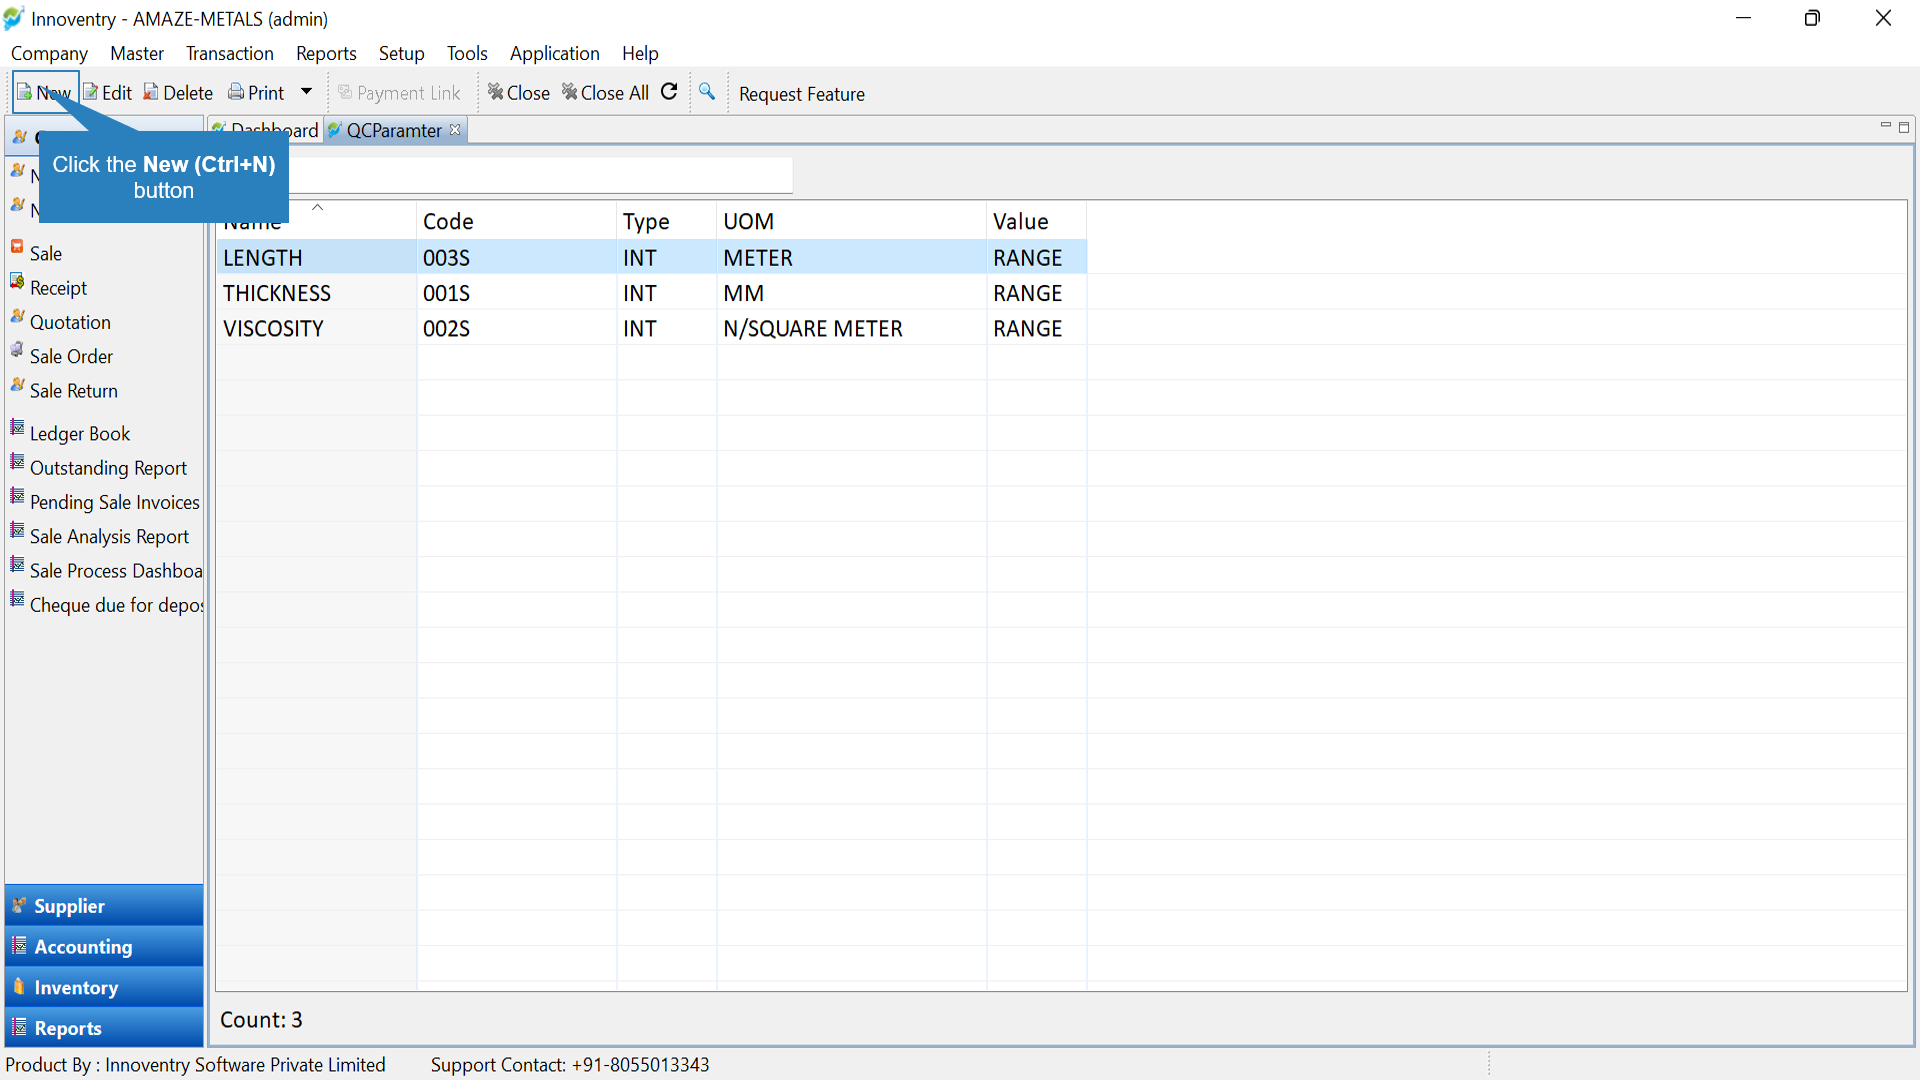
Step 2: The QCParameter dashboard opens. Here to add a Parameter click on the “New” option.
Step 3: The “Create new QCParameter” dialog box opens. Here we can define the parameter by feeding in the required details. The type and value can be selected from the drop down list. UOM stands for the Unit of Measurement. Finally Click on the “Save” option to Save the parameter.

Step 4: We can see that the parameter Diameter is added.

>>Defining the Parameter for Particular Items: #
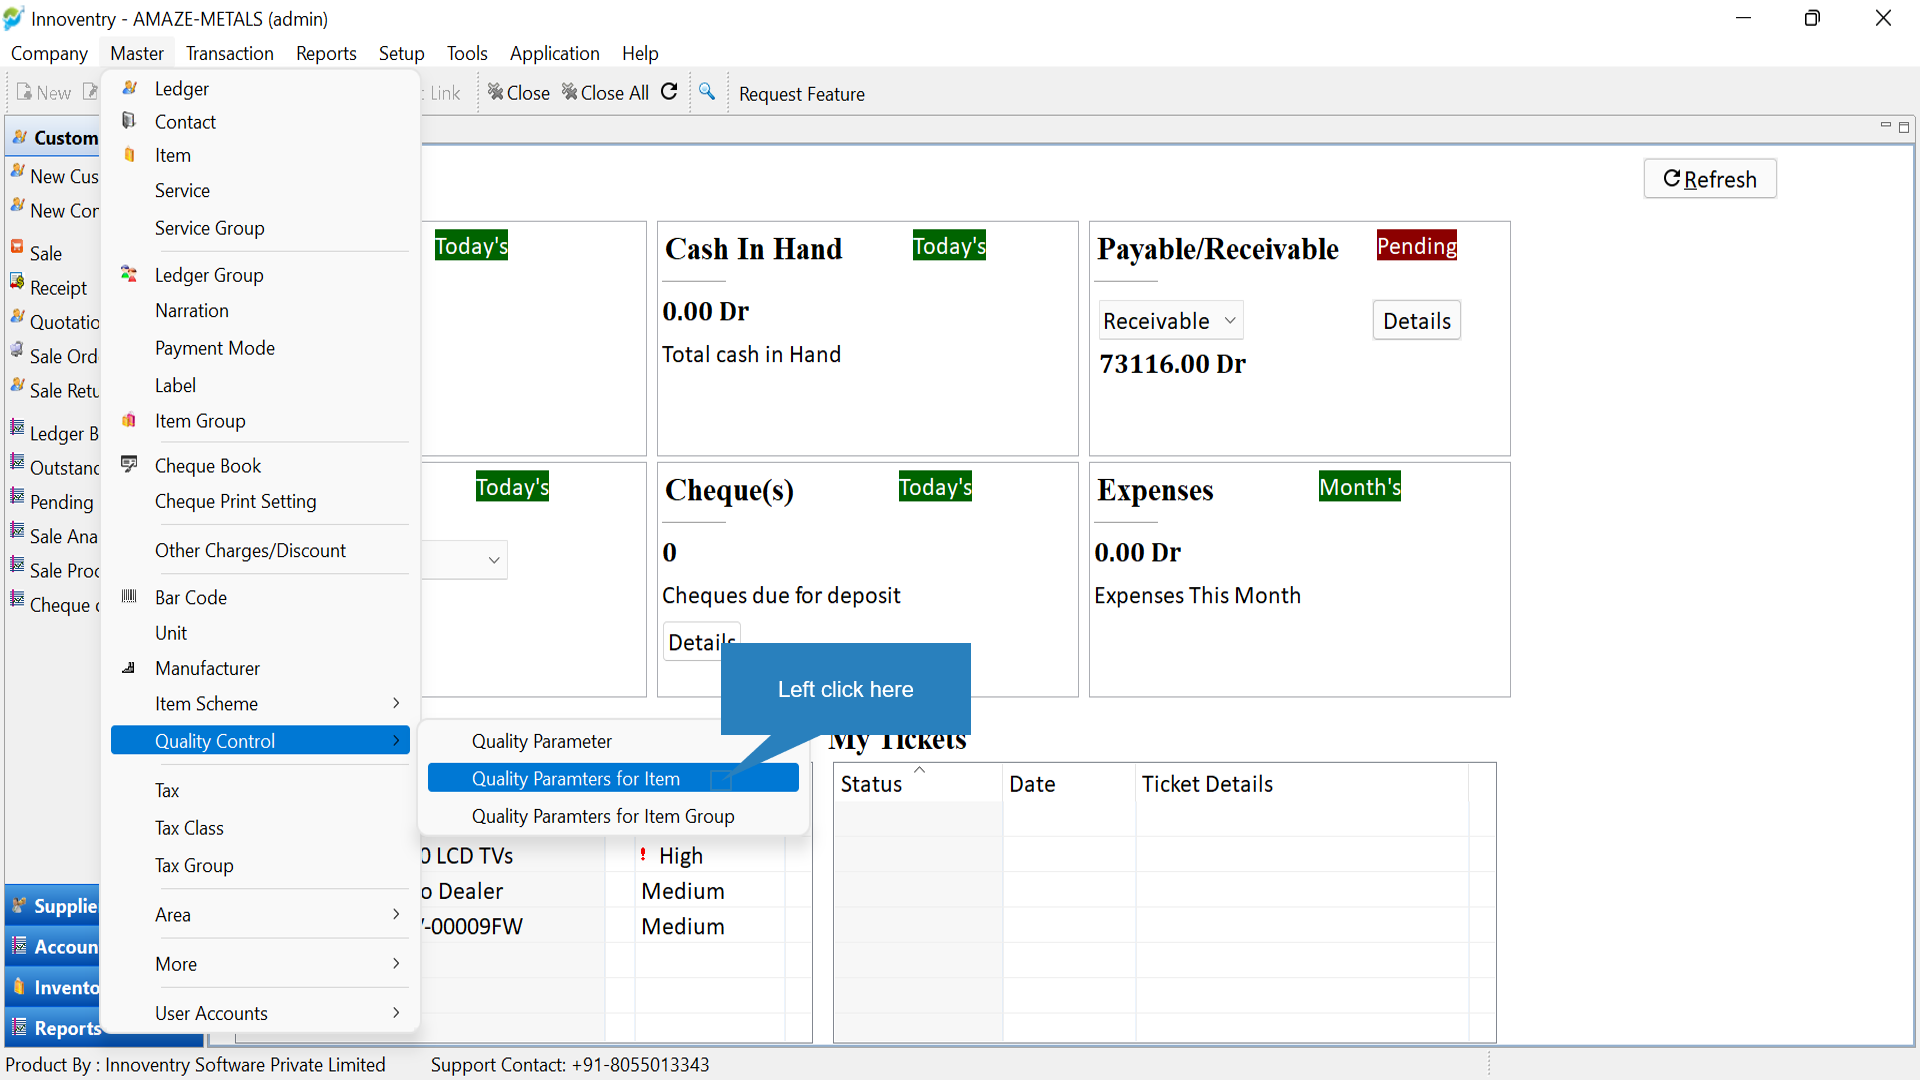
Step 1: Click on Master>Quality Control>Quality Control for Item.
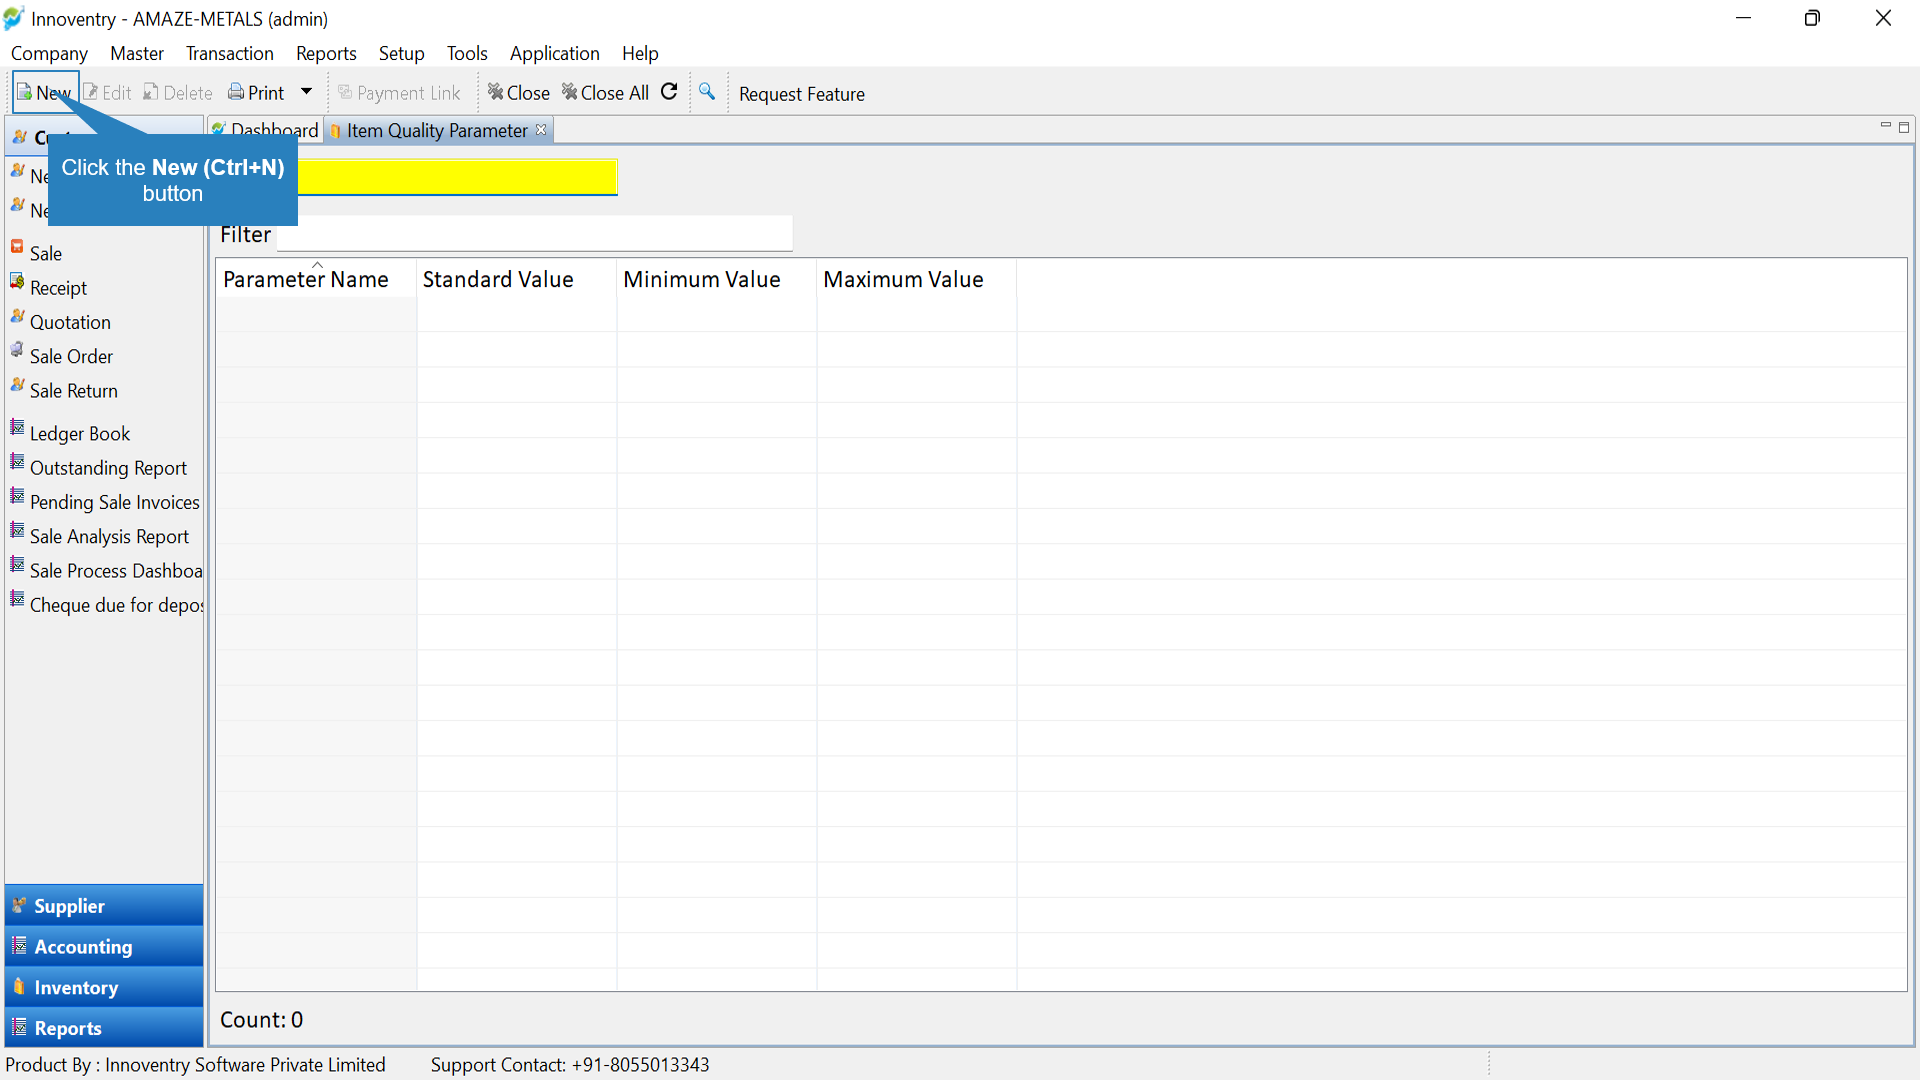
Step 2: Click on New to assign a parameter to the item.
Step 3: “Create New Item Quality Parameter” dialog box opens. Here the user can select the item and then select the parameter(which we had created in the previous step) to be assigned to the item. The user can then feed on the standard value and the range up to which the values are acceptable. Finally click on the “Save” option to save the parameter.

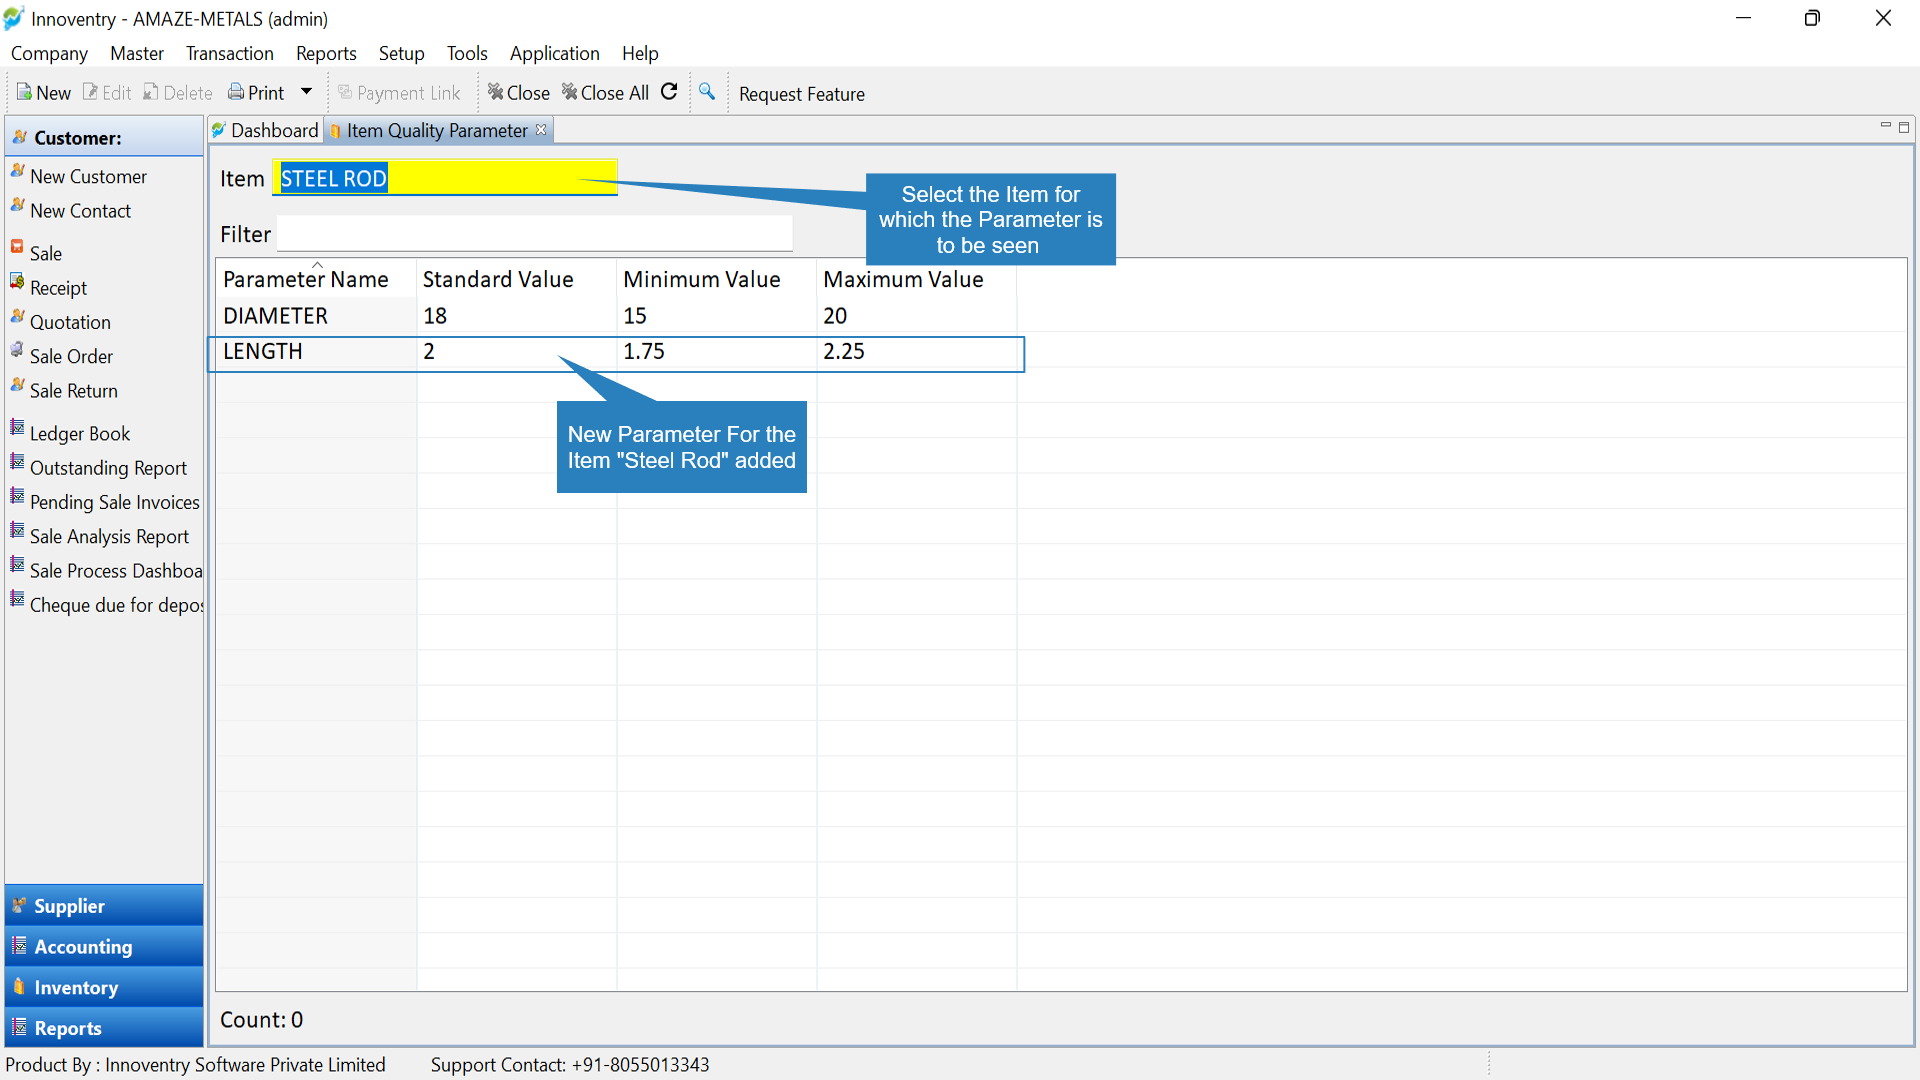
Step 4: In the dashboard now we can select the item and all the assigned parameters will be displayed in the dashboard with the standard and range of values. So we saw how to assign parameters for items.
>>Defining the Parameter for Particular Item Group: #
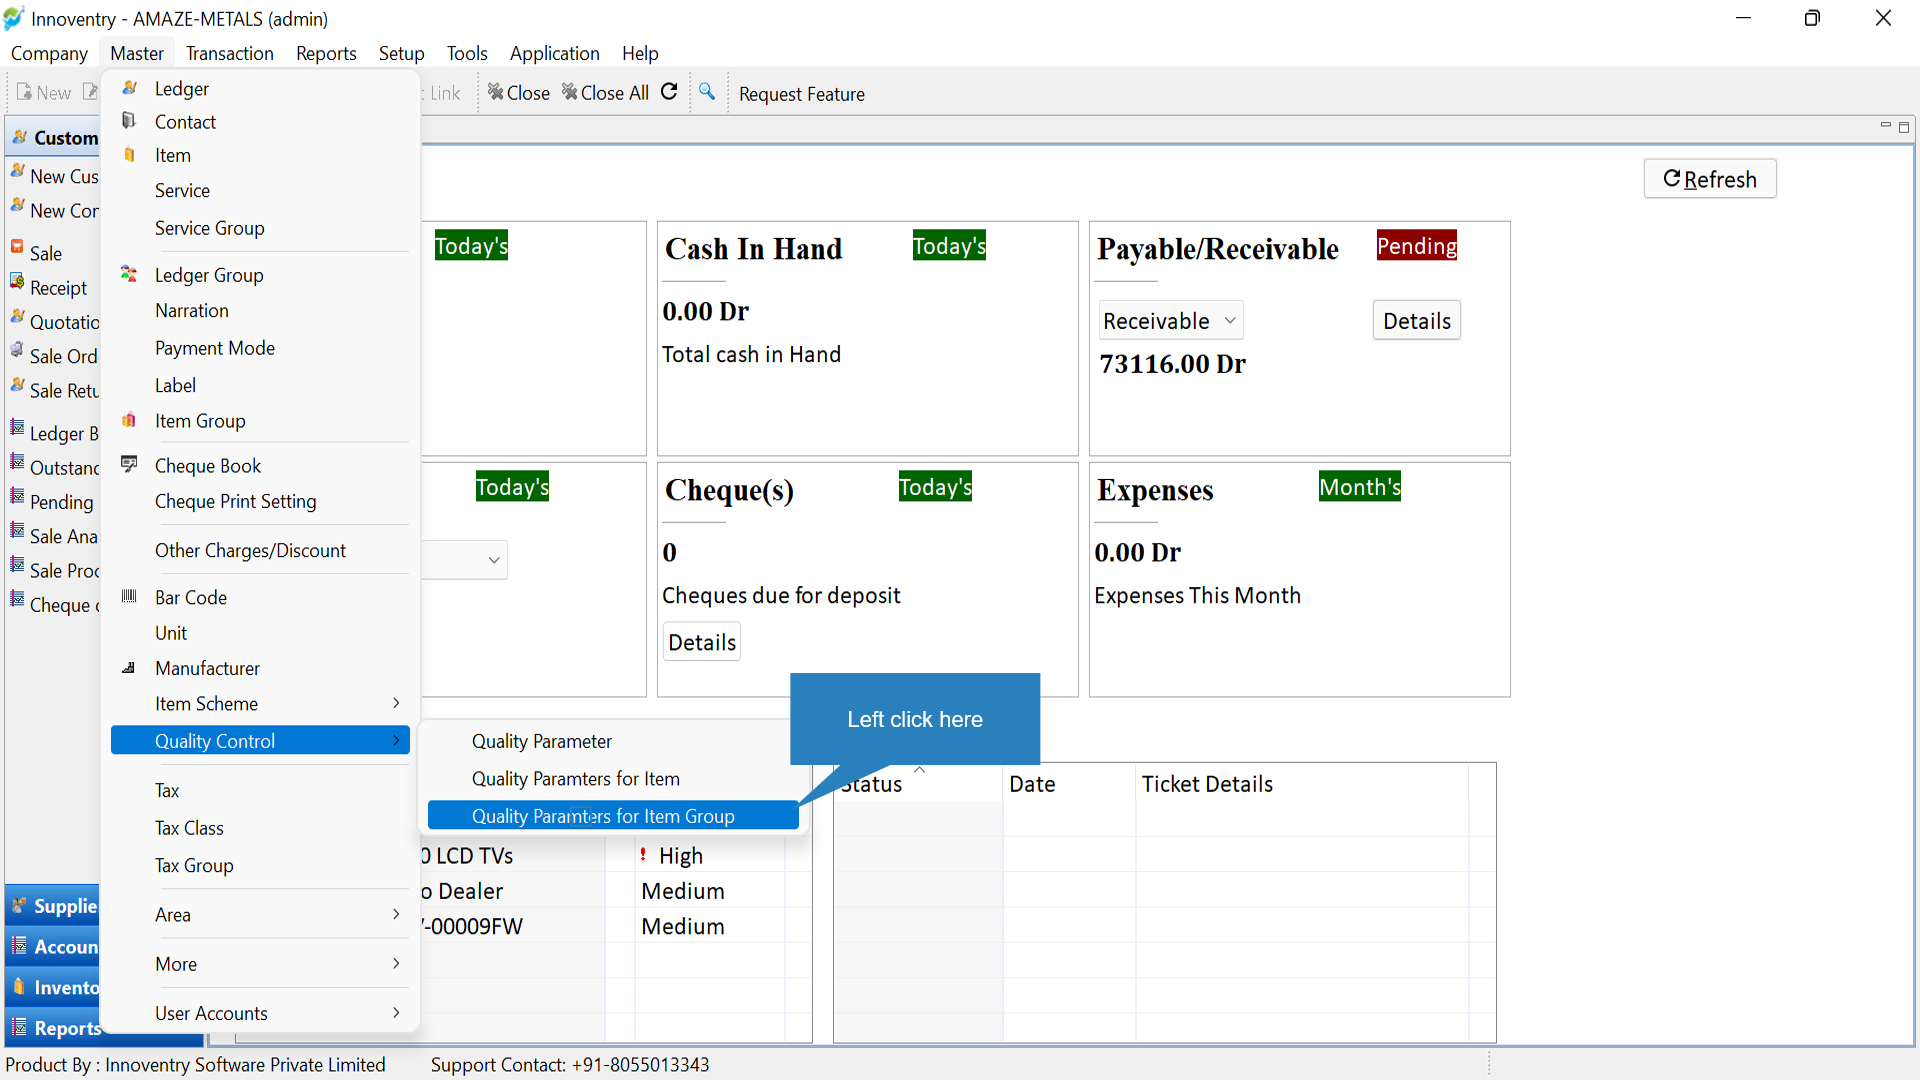
Step 1: Click on Master>Quality Control>Quality Control for Item Group.
Step 2: Click on New to assign a parameter to the item group.

Step 3: “Create New Item Quality Parameter” dialog box opens. Here the user can select the item group and then select the parameter(which we had created in the previous step) to be assigned to the item group. The user can then feed on the standard value and the range up to which the values are acceptable. Finally click on the “Save” option to save the parameter.

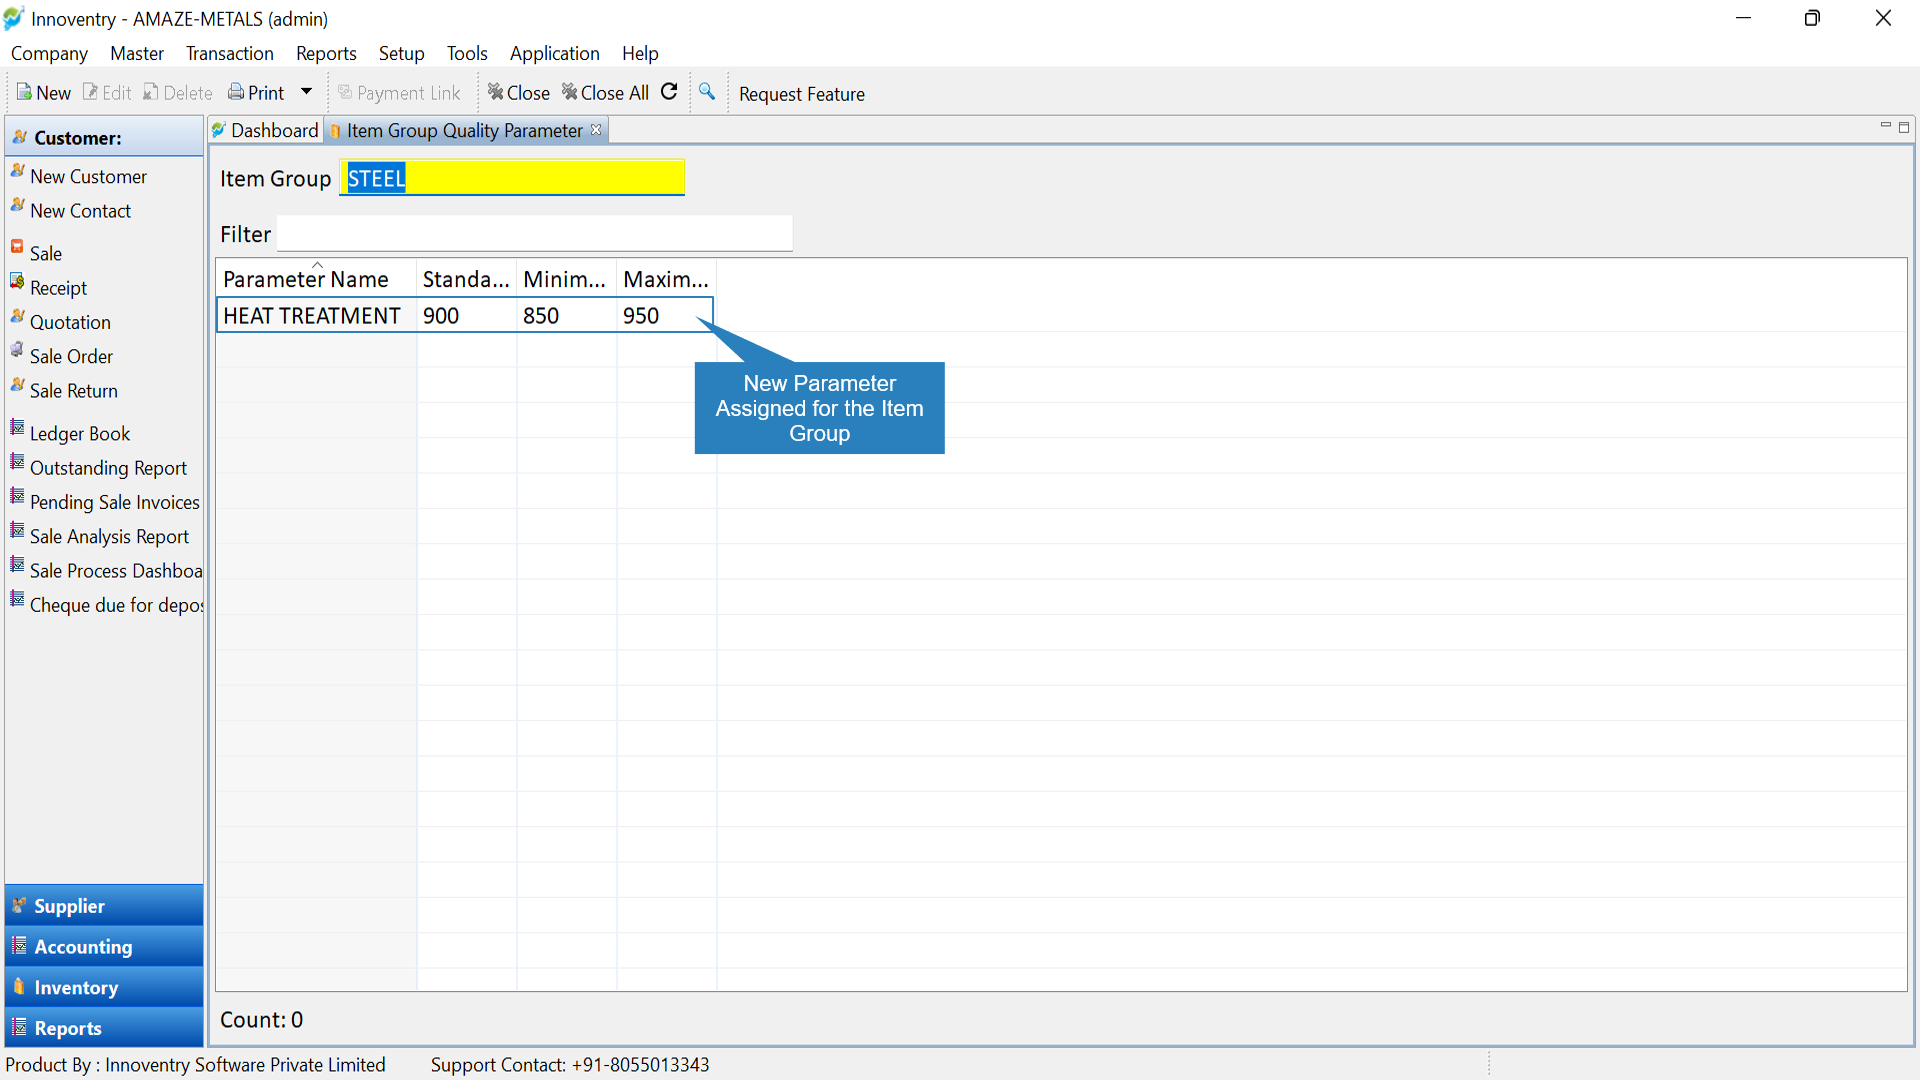
Step 4: In the dashboard now we can select the item group and all the assigned parameters will be displayed in the dashboard with the standard and range of values. So we saw how to assign parameters for item group.
>>Using the QCParameters in Purchase Process & Printing QC Report: #
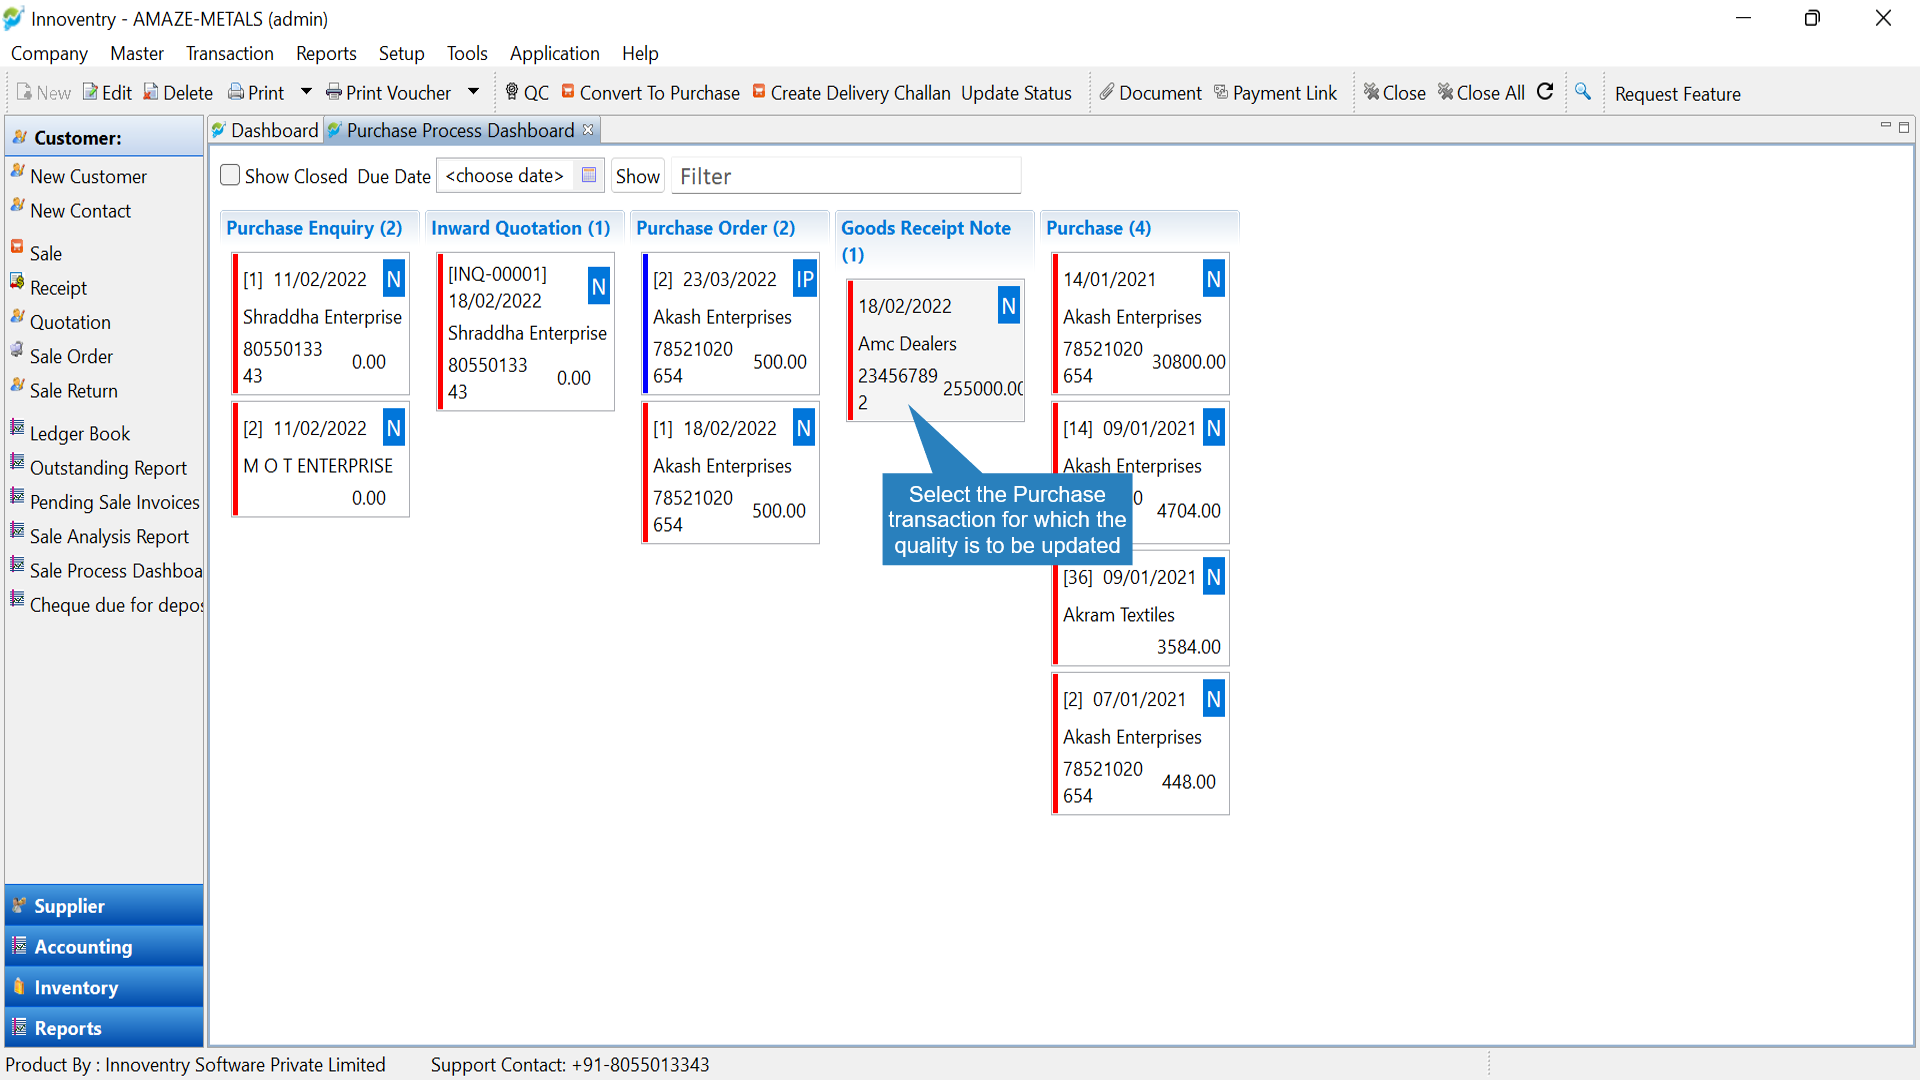
Step 1: Open the “Purchase Process Dashboard” and them select the purchase transaction for which the Quality Control Parameter is to be updated.
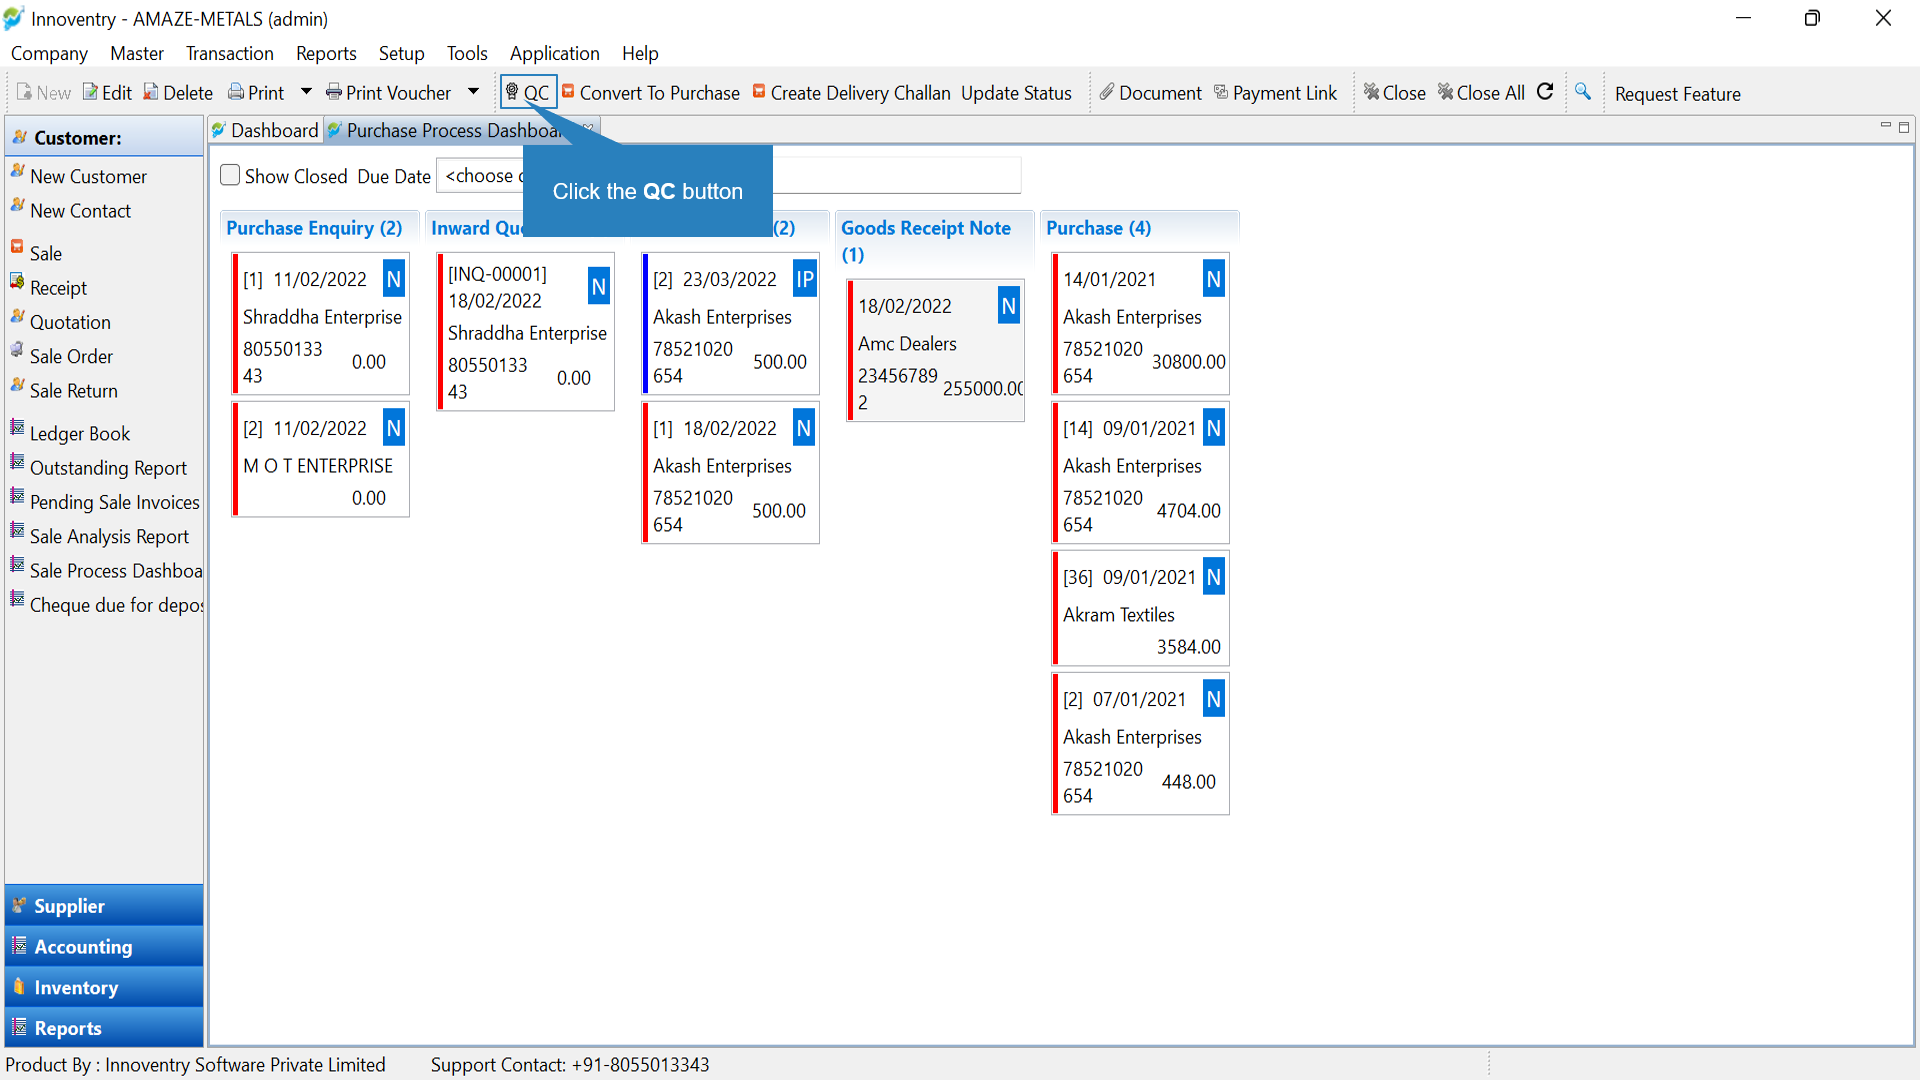
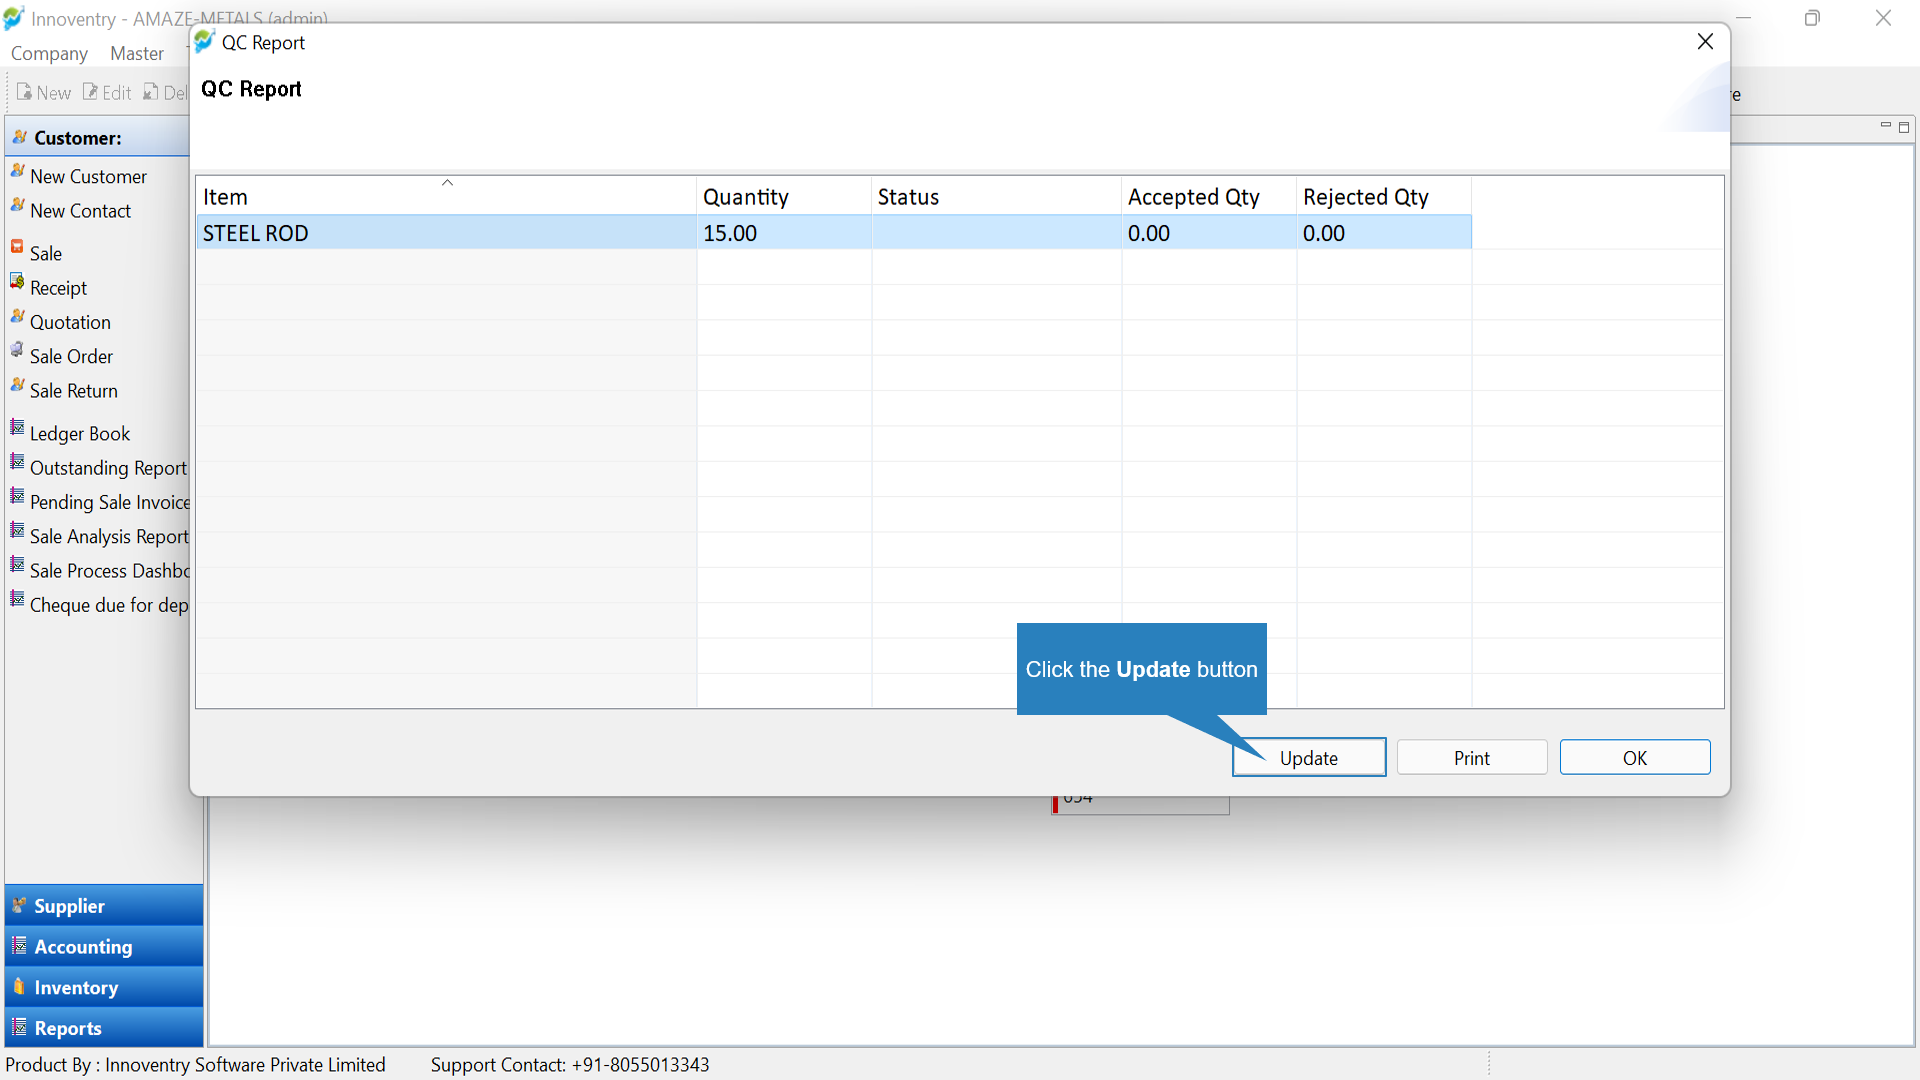
Step 2: Then click on the “QC” button. This opens the QC Report Tab.
Step 3: Click on the “Update” option to update the transaction for selected item.
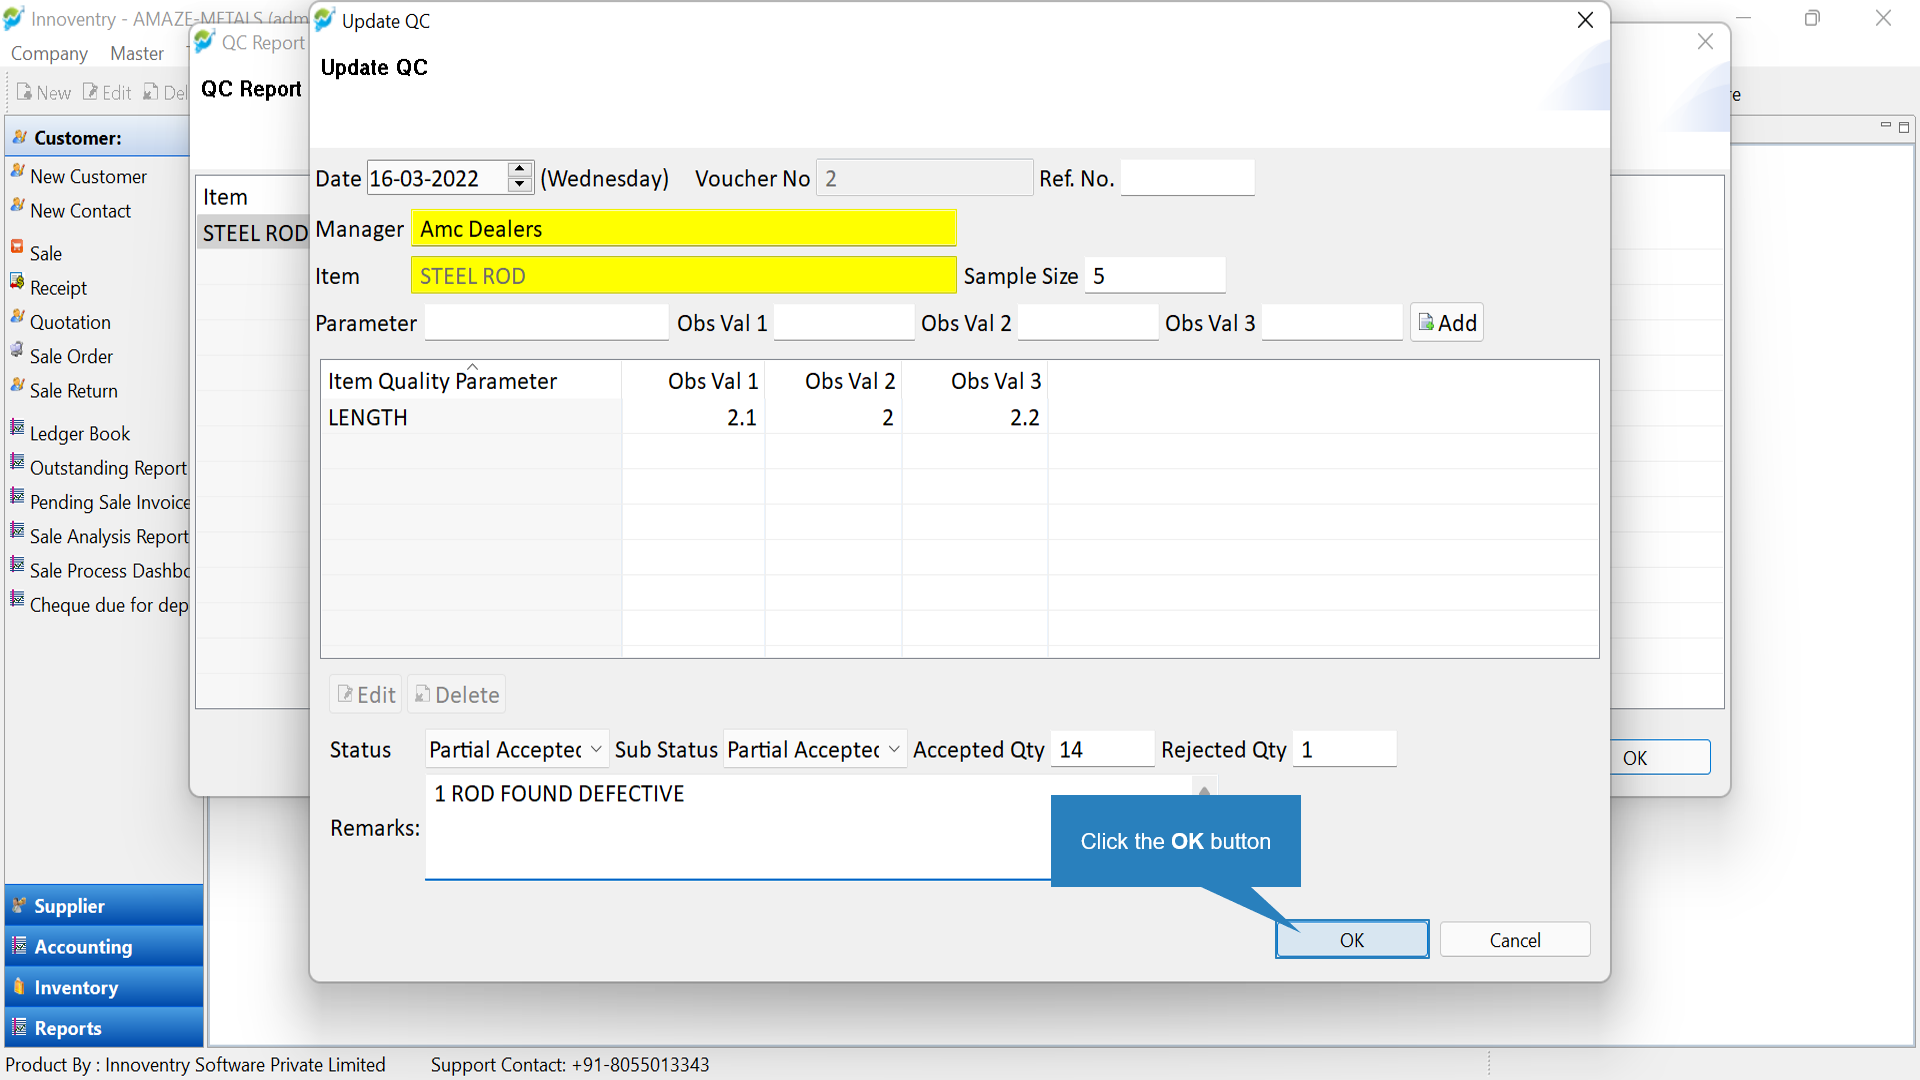
Step 4: The Update QC dialog box appears. Here, the user can input all the data according to the relevant sample which was analyzed. For example, the Sample Size, Parameter, Observed Values. Also Status can be updated i.e. if the commodity was Accepted/Rejected/Partially Accepted with the relevant quantities corresponding to the same. The user can also add Remarks if required. Finally click on the OK button to save the Observations.
Step 5: To print the QC Report, click on the “Print” option.

Step 6: The QC Report showing the Parameter, optimum vales and actual values is displayed. This can be printed or saved to the computer as PDF.


